Dentascribe’s audio transcription feature allows you to transcribe your appointment audio and use the transcript and AI to generate perfectly accurate clinical records and personalised patients letters in seconds.
Transcription works in real-time, capturing the conversation during an appointment and converting it into text. You can then use this transcript to generate a complete clinical note or fill in specific sections of a template.
Try our interactive demo to see how audio transcription works in practice. It will guide you through the entire recording process.
Try Audio Note Demo1. Connect a Microphone
For best results, use a lapel microphone that you can attach to your scrubs.
Recommended microphone: Wireless Lavalier Microphone
While you can use any microphone, keep these tips in mind:
- Lapel (lavalier) microphones are ideal for the dental environment as they capture your voice clearly.
- Avoid desk microphones - they’re not suited to the dental environment
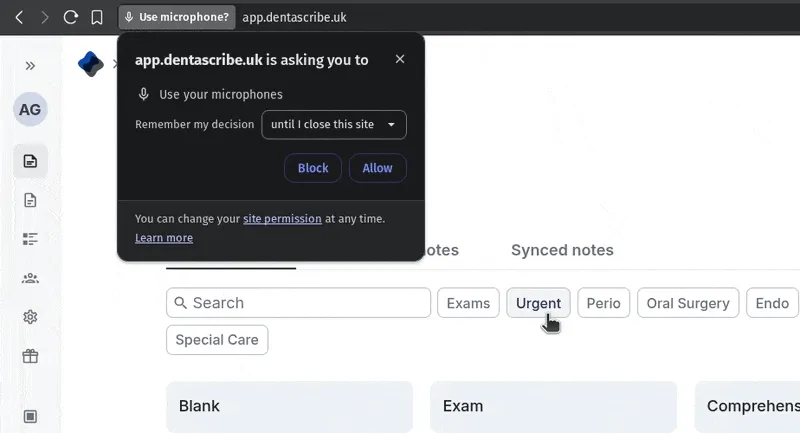
The very first time you click ‘Start Recording’ or ‘Test Audio’, your web browser will ask for permission to access your microphone. You must click Allow for the transcription feature to work.
2. Start and Stop Recording
Once you have your microphone connected:
- Look for the recording sidebar on the right-hand side of the screen
- Click on the icon to expand the recording panel if it’s not already open
- When you’re ready, click Start recording
- To pause, click the icon
Always inform patients that you’re recording the appointment and obtain their explicit consent before starting the recording. Even though you are not storing the audio, this is required for GDPR compliance.
3. View the Transcript
Once you begin recording, a live transcript of the audio will automatically appear in the editor sidebar. Please note there is a brief, intentional processing delay, so you will typically see the text appear 20-40 seconds after it is spoken.
- Automatic Saving: The transcript is saved continuously as you record, so you don’t need to worry about losing your transcript.
- Don’t Worry about Errors: While the transcript is highly accurate, it may not capture every word perfectly. This is expected. Our AI is specifically designed to understand context and meaning, allowing it to generate accurate notes even from an imperfect transcript.
To clear the transcript, click the icon.
Testing Your Microphone Setup
If you’re having problems with your microphone, you can run a quick test.
- In the recording sidebar, click Test audio
- Click Start Recording and speak into your microphone for a few seconds.
- Click Stop Recording
- Dentascribe will show you the resulting transcript, confirming that your audio is being picked up correctly. If the audio is not being picked up, there may be a problem with your microphone setup. If you have a wireless microphone, double check that it’s not out of battery.
Next Steps: Using Your Transcript
The next step is to turn your transcript into a clinical note. You can use it to automatically generate a full record or to fill in parts of a template.
Learn how in our guide: Generating Audio Notes.